Creating Web Reports Using the Wizard
When you use the traditional method, you can create complex web reports with multiple components in a tabular style layout using the Web Report Wizard. This topic describes how you can create web reports using the wizard.
- Choose a way to open the Web Report Wizard:
- In the Start Page of the Server Console, select Web Report in the Create category. Server displays a page. Select the folder in which you want to create the report, then the catalog that contains the required business view. Select OK.
- On the Server Console, go to the Resources page, then:
- Select New > Web Report on the task bar. Server displays a page. Select the folder in which to create the report, then the catalog that contains the required business view. Select OK.
- Open a folder that contains catalogs, select a catalog for the new report from the Catalog button
 drop-down list, and then select New > Web Report on the task bar.
- In the Web Report Studio, select Menu > File > New Report or the New Report button
 on the toolbar.
Server displays the Web Report Wizard.
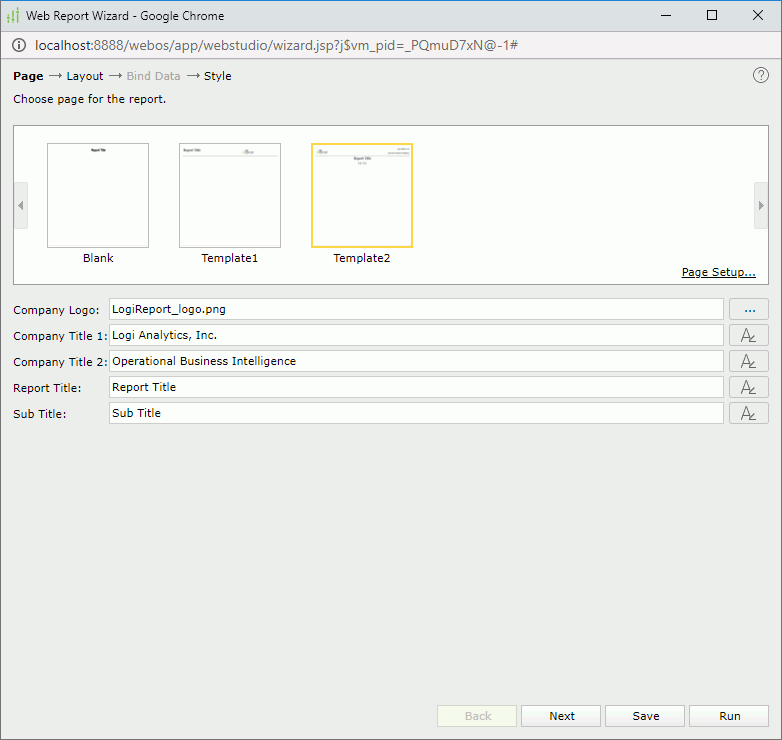
- In the Page screen, choose a page template for the report. The built-in page templates contain information about Logi. You can customize the selected template as you want.

- Select the ellipsis button
 to load your company logo.
 - Edit the text of the titles
- Set the font properties for the titles using
 .
. - Select Page Setup if you want to set the page properties.
If you are an administrator with the privilege of publishing resources, you can also create a new page template to save your customization.
- Select Next.
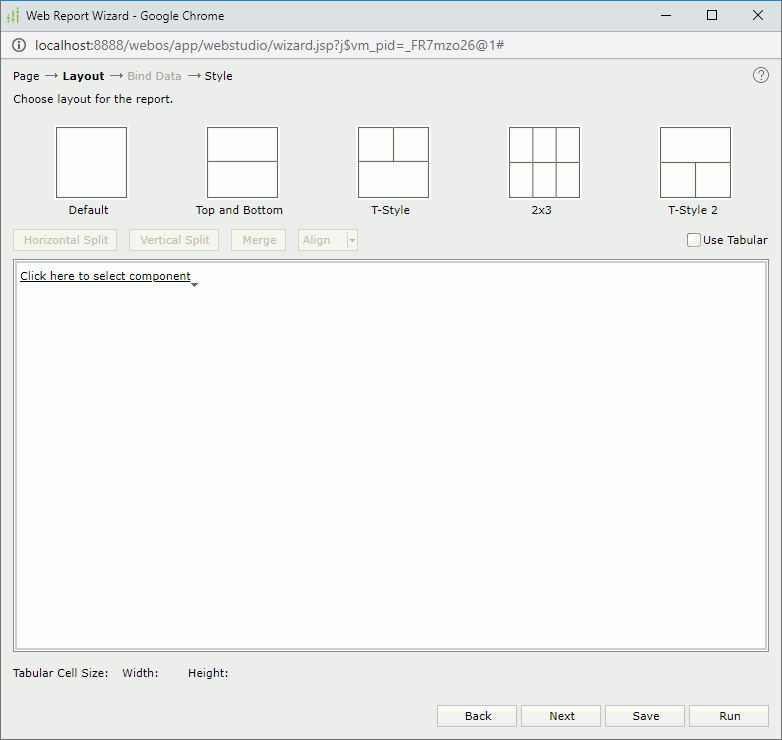
- In the Layout screen, select the layout with which you want to arrange the components in the report.

- In the editing layout box, you can split a selected cell horizontally or vertically using the Horizontal Split or Vertical Split button, and merge adjacent cells by selecting them and using the Merge button.
- Select Click here to select component and then choose a component type in each cell.
- You can resize the cells by dragging the cell border.
- By default, the built-in layouts only determine the absolute position of the components in the report. If you want to use a tabular to arrange the components in the report for more precise layout functionality, select Use Tabular. When you do this, you can further adjust the component position in a cell from left to center or right: select the cell, then select an item from the Align drop-down list.
- Select Next.
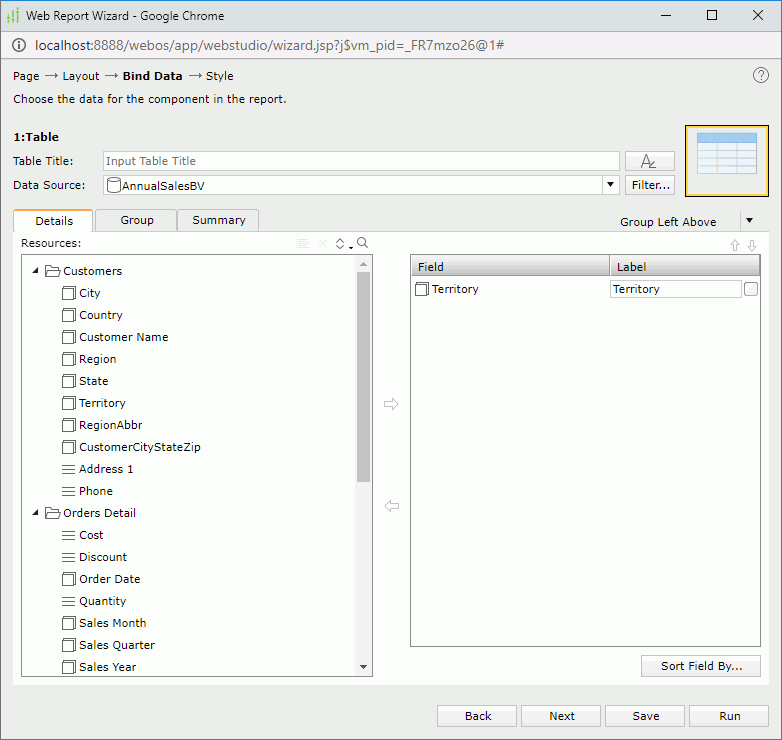
- In the Bind Data screen, define the specified components. For more information, see Inserting Components in Web Report. You can create and use dynamic resources in the components. To switch between the components, make use of the Back and Next buttons.

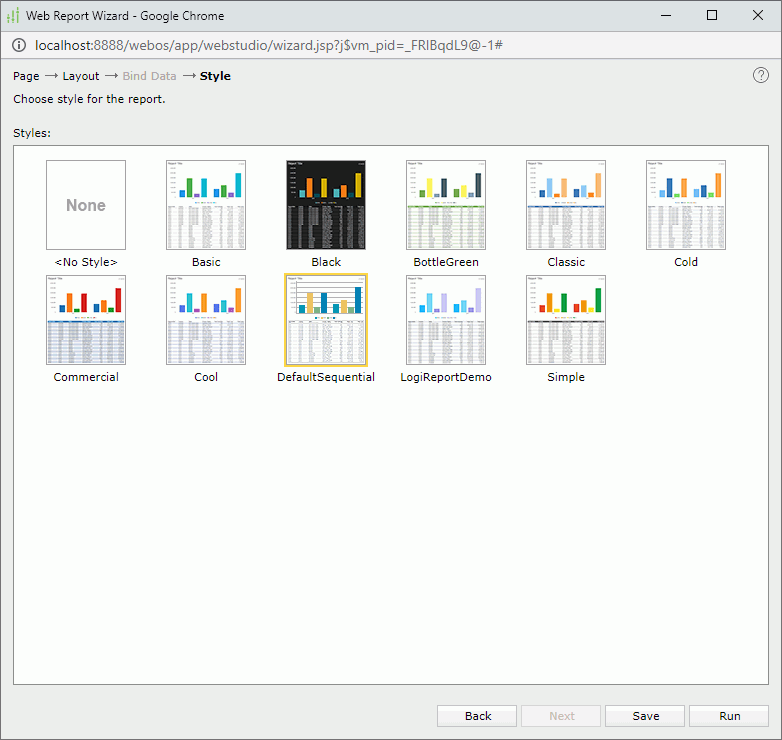
- In the Style screen, select a style you want to apply to the report.

- Select Save if you want to save the report to the server resource tree. For more information, see Saving a Web Report.
- Select Run to run the report. If the report uses any parameter, Server displays the Enter Parameter Values dialog box for you to specify the parameter value, and then opens the report in Web Report Studio.
You can also use URL command to directly open the Web Report Wizard to create a web report using the wizard.
 Previous Topic
 Back to top