 Previous Topic
Formatting the Wall/Floor
This topic introduces how you can format the wall and floor of a chart.
This topic contains the following sections:
 2-D charts do not have floor, and pie and organization charts do not have either floor or wall.
Formatting the Wall of a Chart
- Right-click any chart element and select Format Walls > Format Wall on the shortcut menu or double-click the wall of the chart. Designer displays the Format Wall dialog box.
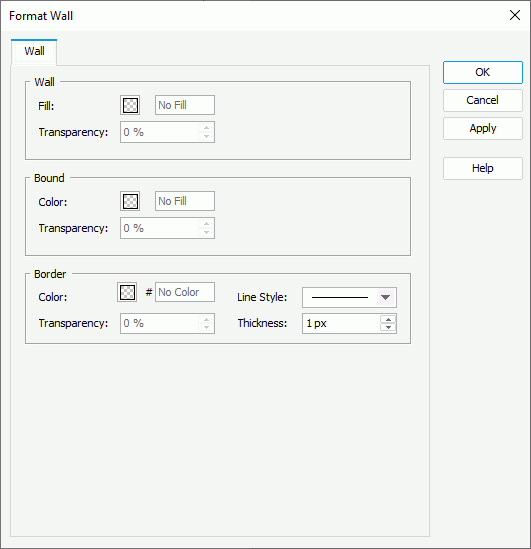
- In the Wall box, specify the color or effects to fill the wall and the transparency of the color or effects, which Designer applies as the basic fill of the wall (to change the color, select the color indicator and select a color from the color palette, or type the hexadecimal value of a color in the text box).
- In the Bound box, specify the fill color or effects to compound with the basic fill of the wall.
- In the Border box, specify the color, color transparency, line style, and thickness for the border of the floor.
- Select OK to accept the changes and close the dialog box.
 Back to top
Formatting the Floor of a Chart
- Right-click any chart element and select Format Walls > Format Floor on the shortcut menu or double-click the floor of the chart. Designer displays the Format Floor dialog box.
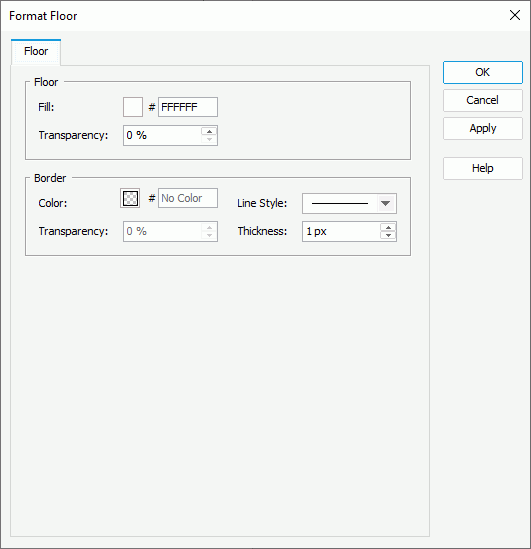
- In the Floor box, specify the color or effects to fill the floor and the transparency (to change the color, select the color indicator and select a color from the color palette, or type the hexadecimal value of a color in the text box).
- In the Border box, specify the color, color transparency, line style, and thickness for the border of the floor.
- Select OK to accept the changes and close the dialog box.