 Previous Topic
Creating and Saving Dashboards
This topic describes how you can create and save dashboards and insert a variety of components in dashboards.
This topic contains the following sections:
- Creating a Dashboard
- Inserting Components in a Dashboard
- Inserting Library Component References
- Inserting Report Data Components
- Inserting Analysis Templates As Components
- Inserting a Label/Dashboard Title
- Inserting an Image
- Inserting a Special Field
- Inserting a Filter Control
- Inserting a Third-Party Gadget via URL
- Inserting an HTML Component
- Saving a Dashboard
Creating a Dashboard
- Do either of the following:
- In the Start Page of the Server Console, select Dashboard in the Create category.
- On the Server Console, open the Resources page and select New > Dashboard on the task bar.
JDashboard creates a blank dashboard.
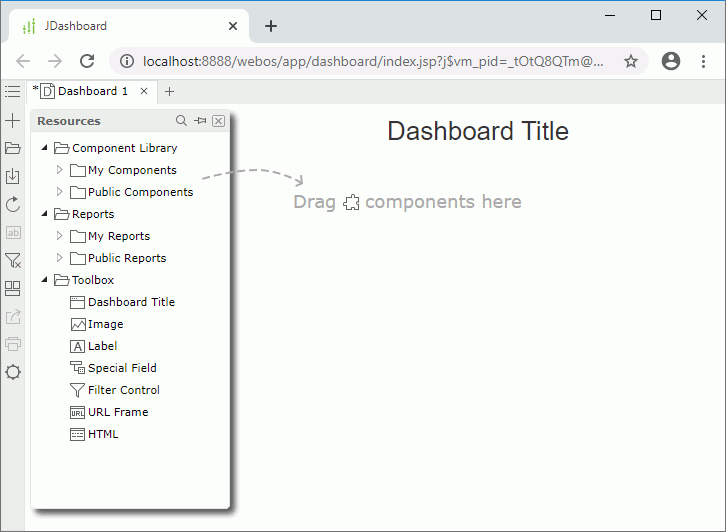
- The upper section with the text "Dashboard Title" of the editing area is the dashboard header, where you can insert labels, images, and special fields. The dashboard body is the section following the header. In the body you can insert report components, library components, filter controls, third-party objects, and HTML components.
- When you hover the mouse on the header section, JDashboard outlines the header and you will see the border between the header and the body. You can resize the two sections by dragging the border line. You can hide the header using the arrow button that appears at the bottom right of the header.
After you enter JDashboard, you may want to create more dashboards in the same web browser. For more information, select here.
 Back to top
Inserting Components in a Dashboard
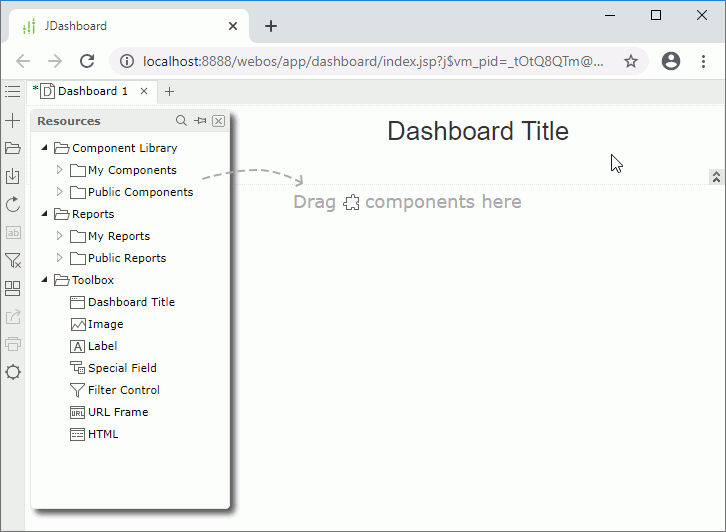
You can insert library components and report data components as well as labels, images, special fields, filter controls, third-party objects, and HTML components into dashboards via the Resources panel. To access the panel, select the Show Resources button  on the toolbar.
Inserting Library Component References
When you insert a library component from the component library into a dashboard, you are not copying it from the component library, but instead referencing it. In this sense, after you edit a library component in Logi Report Designer and then republish it to the component library, you will see the changes in all the dashboards that reference the library component. If you make any changes to a library component in a dashboard. JDashboard saves the changes into the dashboard only without affecting the source library component. However, if the same change in a library component happens both at design time in Logi Report Designer and at runtime in a dashboard, the runtime change has higher priority.
To reference a library component into the dashboard body:
- Select the Show Resources icon . JDashboard displays the Resources panel.
- In the Component Library folder, browse to find the library component you want to insert, and then drag it to the destination in the dashboard body.
Inserting Report Data Components
You can insert data components, such as tables, crosstabs, charts, KPIs, and geographic maps in reports, into dashboards directly. JDashboard will convert them into library components automatically when you insert them.
For reports (excluding shared reports) that use business views as data sources, JDashboard can convert all data components in them to library components successfully.
However, page reports may use queries as data sources other than business views. For a data component that is created using a query, only when there is a business view based on only the query in the catalog, can JDashboard convert the component to a library component and use it in dashboards.
Currently library components do not support some features of page report components. After you insert the latter into dashboards, JDashboard will remove those features. This may result in that the data components in dashboards look different from when they are in page reports. For features JDashboard does not support, JDashboard will ignore or remove them, or apply the default values to them.
The following table lists how JDashboard deals with the unsupported page report features:
| In Page Report Components | In Library Components |
|---|---|
| Display types like Barcode and Checkbox | Ignored |
| Special fields | Removed |
| Dynamic resources | Changed to constant resources |
| Master/Detail reports | Ignored |
| Subreports | Removed |
| Nested data components that is one contains another | The ownership is removed, and the involved data components are regarded as individual components. |
| Definition properties | Ignored |
| Formula-controlled properties | Default values are applied. |
| Other components | Removed |
To insert a report data component into the dashboard body:
- Select the Show Resources icon . JDashboard displays the Resources panel.
- Expand the Reports node to locate the report that contains the desired data component.
- Expand the report.
- Drag the data component into the dashboard body.
- If the data component uses parameters, JDashboard will apply the default values. You can change the parameter values via the configuration panel after JDashboard loads the component.
After you insert it into a dashboard, the report data component runs with the report's catalog. It will not be able to run if the catalog is removed or updated. The runtime filters will not affect the report data components in dashboards.
Inserting Analysis Templates As Components
After you save analysis templates into the server resource tree, you can insert them into dashboards as components. To do this, you should have the license for Visual Analysis.
To insert an analysis template as component into the dashboard body:
- Select the Show Resources icon . JDashboard displays the Resources panel.
- Expand the Reports node to locate the target analysis template with .va as the suffix.
- Expand the analysis template. You will find a VCTObject under it.
- Drag this VCTObject into the dashboard body.
JDashboard will wrap the analysis template into a runtime library component, and display its data presentation area and legend area without legend icons, just for viewing. However, if no field binds with any legend, JDashboard will not display the legend area. The default title is the server resource name of the parent analysis template without the suffix .va.
You cannot export or print the inserted analysis templates. Therefore, when you export or print a dashboard, JDashboard will not display them and will leave the cells containing them blank.
Inserting a Label/Dashboard Title
You can insert labels in the dashboard header. A dashboard title is a special label.
- Select the Show Resources icon . JDashboard displays the Resources panel.
- Drag Label or Dashboard Title from the Toolbox to the destination in the dashboard header.
- Double-click the label or title and edit the text.
- You can hover the mouse pointer on the label and select the Edit button
 that appears around it to edit its properties such as font, size, and color in the Edit Label dialog box.
Inserting an Image
You can insert images in the dashboard header.
- Select the Show Resources icon . JDashboard displays the Resources panel.
- Drag Image from the Toolbox to the destination in the dashboard header. JDashboard displays the Insert Image dialog box.
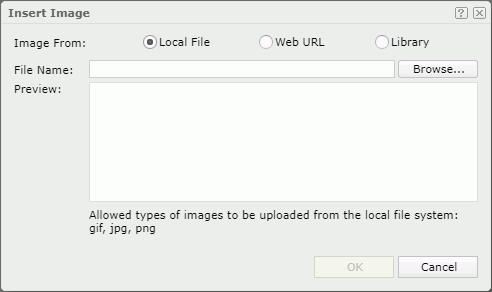
- Specify the image you want to insert.
- To use an image in the local file system, select Local File, and then select Browse to find the image.
- To use an image on a website, select Web URL, and then type the image URL or paste the URL in the File URL text box.
- To use an image in the image library of JDashboard, select Library, and then select the image in the My Pictures box.
- Select OK to insert the image.
After you insert an image in the dashboard header, if you want to change it, hover the mouse pointer on the image and select the Edit button that appears around it, then in the Edit Image dialog box, select another image to replace the current one.
Inserting a Special Field
You can insert special fields in the dashboard header.
- Select the Show Resources icon . JDashboard displays the Resources panel.
- Drag Special Field from the Toolbox to the destination in the dashboard header. JDashboard displays the Insert Special Field dialog box.
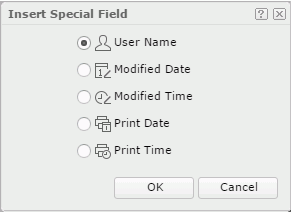
You can insert these types of special fields in the dashboard header:
- User Name
The username with which you sign in to Logi Report Server. - Modified Date
The date when the dashboard was last modified. - Modified Time
The time when the dashboard was last modified. - Print Date
The date to run the dashboard. - Print Time
The time to run the dashboard.
- User Name
- Choose the desired special field and select OK to insert it into the header.
- You can hover the mouse pointer on the special field and select the Edit button that appears around it to edit its properties such as font, size, and color in the Edit Special Field dialog box.
Inserting a Filter Control
You can insert filter controls in the dashboard body and use them to filter component data. For more information, see Filtering Component Data.
Inserting a Third-Party Gadget via URL
You can insert a web page in the dashboard body. All you need to do is give its URL.
 Some web sites such as
 http://www.google.com do not allow Gadgets to load them.
- Select the Show Resources icon . JDashboard displays the Resources panel.
- Drag URL Frame from the Toolbox into the dashboard body. JDashboard displays the Insert URL Frame dialog box.
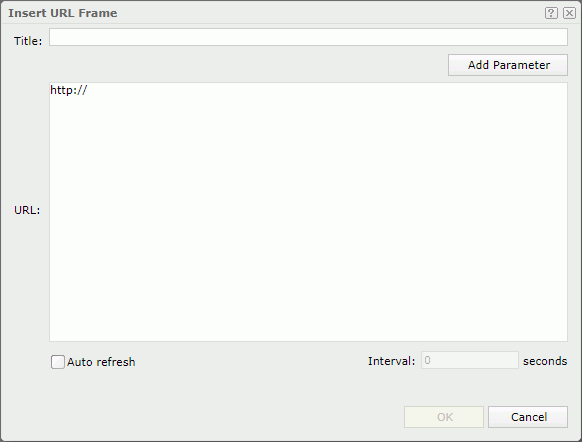
- In the Title text box, give a title for the frame that will display the content of the web page.
- In the URL text box, type the URL of the web page. You can select Add Parameter to open the Select Parameter dialog box to insert a parameter to the URL to compose a dynamic URL (if no data source is specified, JDashboard will display the Select Data Source dialog box for you to select the data source that contains the parameter you want first).
You should provide a complete URL address. Take a URL without "http://" as an example, for instance, www.logianalytics.com, JDashboard will not automatically add "http://" to the URL because it thinks that the URL is a relative path. This may lead to that you cannot open the URL in some browsers.
- If you would like the specified web page to refresh periodically, select Auto refresh, and then specify the time interval at which to refresh it.
- Select OK. JDashboard will insert the specified web page into the dashboard. You can then view the web page from JDashboard. If you have added parameters in the URL, you can select the Enter Parameter Values icon
 on the toolbar to specify the parameter values. Then you can get different web pages based on different parameter values.
To further edit the web page information, select the Edit button  on the component title bar and then select Edit Setting from the drop-down menu. JDashboard displays the Edit URL Frame dialog box. Edit the URL of the web page and other settings as you want.
Inserting an HTML Component
An HTML component enables you to type text, comments, and messages using a simple-featured text editor. You can insert it in the dashboard body.
- Select the Show Resources icon . JDashboard displays the Resources panel.
- Drag HTML from the Toolbox to the destination in the dashboard body. JDashboard displays the Insert HTML dialog box.
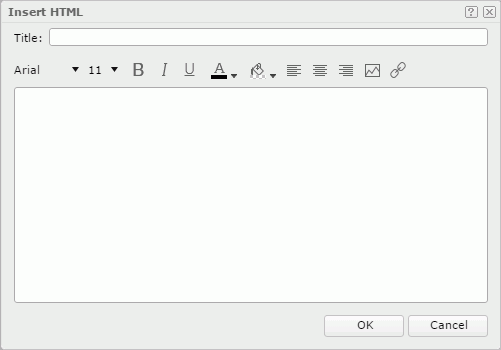
- Specify a title for the HTML component.
- In the text box:
- Type text directly and format the text such as font face, size, style, color, and alignment using the corresponding buttons.
- If you want to use an image in the HTML component, select the Insert Image icon
 . JDashboard displays the Insert Image dialog box. Specify an image in the dialog box.
 - You can also select some text or an image and then select the Hyperlink icon
 to create hyperlink on the text or image in the Hyperlink dialog box.
- Select OK to insert the HTML component.
To further edit the HTML component, select the Edit button on its component title bar and then select Edit Setting from the drop-down menu. JDashboard displays the Edit HTML dialog box. Edit its title and content in the dialog box.
Saving a Dashboard
To save the changes you made to the current dashboard tab, select the Save button  on the toolbar, or select the Options button
  and then select Save from the option list. You can only save a single tab as a dashboard. When JDashboard contains multiple tabs, you should save each tab separately as a different dashboard.
If the dashboard is newly created and you have not saved it yet, JDashboard displays the Save As dialog box.
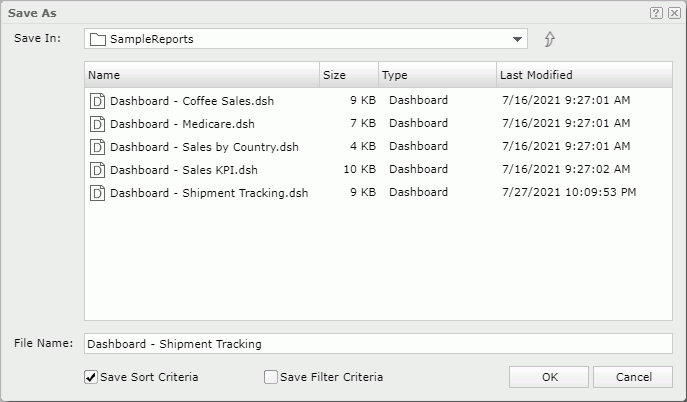
- In the Save In section, browse to the folder in the server resource tree where you want to save the dashboard. You can use the button
 to return to the parent folder.
JDashboard displays the resources in the current directory. You can select the column names to change the order of the resources.
- In the File Name box, type the name of the dashboard or keep the default name.
- If you want to save the report together with the sort and filter criteria, select Save Sort Criteria and Save Filter Criteria correspondingly. With the criteria saved, JDashboard will automatically apply them to the dashboard the next time you open it.
- Select OK to save the dashboard.
To save a copy of a dashboard,
- Select the Options icon on the toolbar. JDashboard displays a submenu.
- Select Save As. JDashboard displays the Save As dialog box.
- Do the same as above.
If you are saving to an existing file, JDashboard will display a Confirm dialog box asking whether you want to replace the file or save a new version into the file.
After saving a dashboard into the server resource tree, you can browse to its directory in the server resource tree on the Server Console and run it directly.
You will not be able to save dashboards to locations where you do not have the Write permission.