Applying the Filter of a Query to Multiple Queries
After you have added filter conditions to a query, you can set its Data Source Filter property to specify whether you want the filter of the query to work as a data source filter, so that you can apply the filter to other queries directly without having to define the filter conditions repeatedly in each of the queries. This topic describes how you can use the filter in a query as a data source filter to filter multiple queries.
This topic contains the following sections:
Using the Filter of a Query as a Data Source Filter
- Create the query with the required data resources.
- Create filter for the query and save the query.
- In the Catalog Manager, select Pre-join.
- In the Select Data Source dialog box, select the catalog data source in which the query is and select OK.
- In the Pre-join Editor dialog box, select Add Tables.
- In the Add Tables/Views/Queries dialog box, select the query you just created and the data resources which you want to join with the query, then select OK.
- Define the joins between the query with the other data resources and save them. For more information, see Editing Pre-joins in a Catalog.
- Set the Data Source Filter property of the query to true.
You can now apply the filter defined in the query (the data source filter query) to all the other queries in the same catalog data source if the other queries can satisfy the following conditions:
- The queries contain the data resources with which the data source filter query is joined.
- The queries do not contain any of the data resources that are included in the data source filter query.
Example of Applying a Data Source Filter
The following example shows the usage of data source filter in detail. In this example, we add a filter "Order ID > 3400" on a query and make it work as a data source filter.
- Make sure SampleReports.cat is the currently open catalog file. If not, select File > Open Catalog to open it from
<install_root>\Demo\Reports\SampleReports. - In the Catalog Manager, right-click the Queries node in Data Source 1 and select New Query from the shortcut menu.
- In the Enter Query Name dialog box, type DSFQuery and select OK.
- In the Add Tables/Views/Queries dialog box, expand the JDBC connection > Tables node, select Orders, select Add
 to add it to the right box, then select OK.
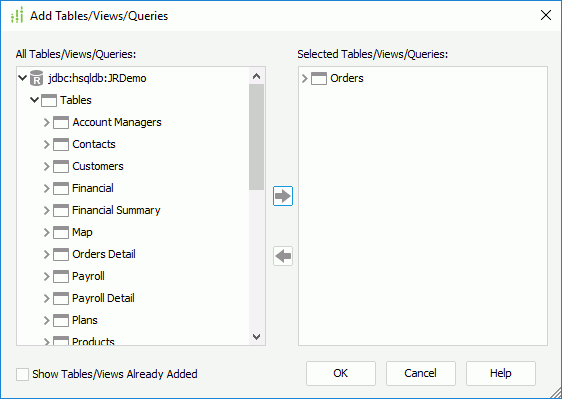
- In the Query Editor dialog box, select all the columns in the Orders table by selecting the top checkbox.
- Select Menu > Query > Filter.
- In the Search Condition dialog box, select Add Condition and define the filter condition as follows. Select OK to accept the condition.
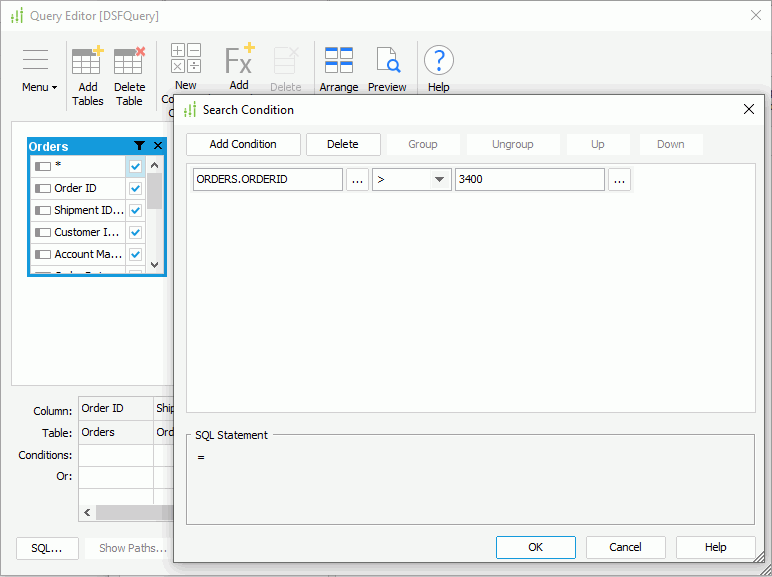
- Select OK in the Query Editor dialog box and then close the prompted dialog box. Designer adds the query DSFQuery under the Queries node in the Catalog Manager and selects it by default.
- Select Show Properties on the Catalog Manager toolbar, then set the query's Data Source Filter property to true.
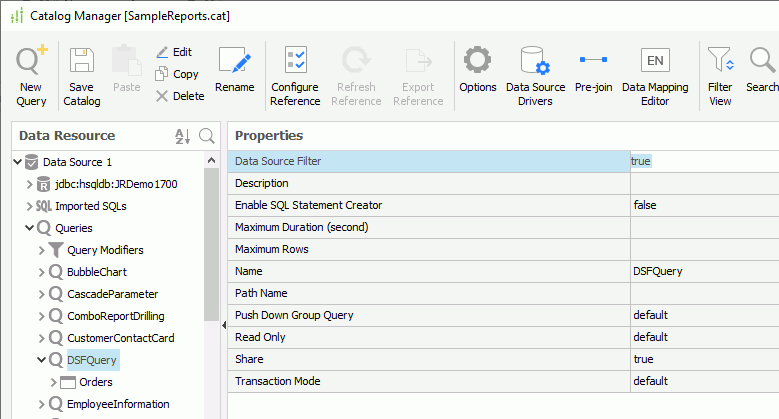
Next, we create a pre-join to join DSFQuery with the table Orders Detail.
- Select Pre-join on the Catalog Manager toolbar.
- In the Select Data Source dialog box, select Data Source 1 and select OK.
- In the Pre-join Editor dialog box, select Add Tables.
- In the Add Tables/Views/Queries dialog box, add the table Orders Detail and the query DSFQuery, then select OK.
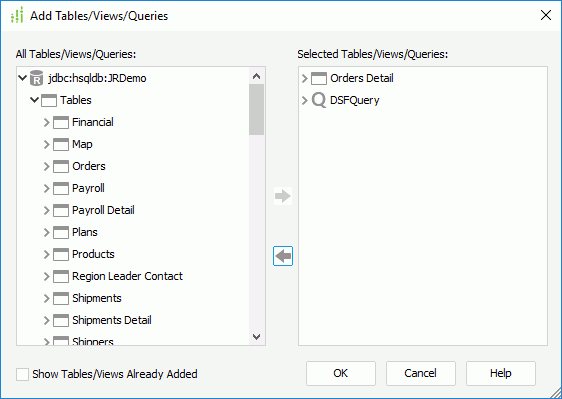
- Join DSFQuery and Orders Detail by connecting their Order ID columns.
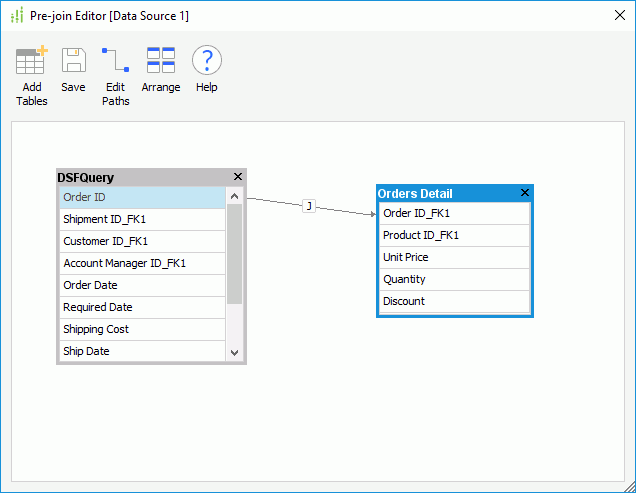
- Select Save to save the pre-join.
- Select Yes in the message dialog box to accept the default path.
Next, we create another query that contains the table joined with DSFQuery and use the query to create a report to test the data source filter.
- Repeat steps 2 to 5 to create another query OrdersDetail which contains the Orders Detail table with all of its columns.
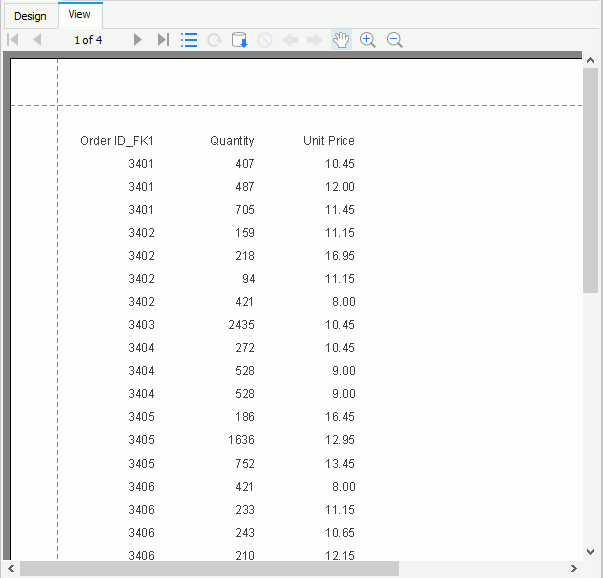
- Create a page report with a standard banded object in it based on the OrdersDetail query, which displays the fields Order ID_FK1, Quantity, and Unit Price.
- Select the View tab to preview the report. The report displays only the records the order IDs of which are higher than 3400.
 Previous Topic
 Back to top