 Previous Topic
Edit Conditions Dialog Box Properties
You can use the Edit Conditions dialog box to edit a condition for adding conditional format. This topic describes the properties in the dialog box.
Advanced/Basic
Select to switch between advanced mode or basic mode.
You see these elements in both modes:
OK
Select to apply any changes you made here and exit the dialog box.
Cancel
Select to close the dialog box without saving any changes.
 Help button
Select to view information about the dialog box.
 Close button
Select to close the dialog box without saving any changes.
Basic Mode
You can create simple filter conditions using the AND/OR logic.
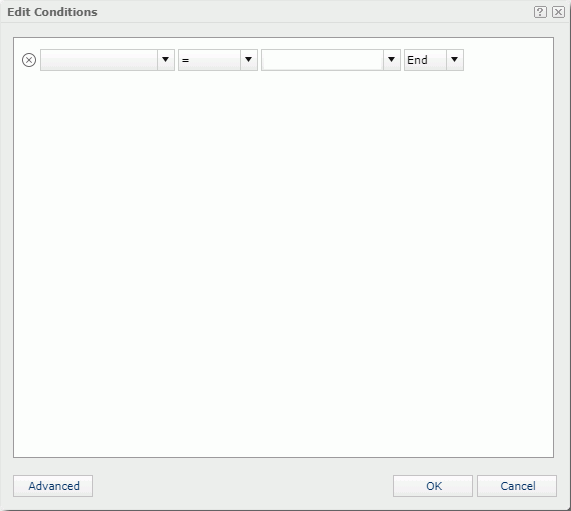
 Remove button
Select to delete the current condition line. Each condition line contains an expression with a logic operator which either connects the current expression with the following one or ends when it is the last line. An expression is composed of a field, an operator, and a value.
Field
Select the field that you want to filter.
Select the operator to compose the filter expression.
- =
Equal to - >
Greater than - >=
Greater than or equal to - <
Less than - <=
Less than or equal to - !=
Not equal to
Specify the value of the field. You can either type the value manually in the text box or select a value from the list.
When you type multiple values manually, you should separate them with a comma",". If you want to include a comma "," or a backslash "\" in the values, write it as "\," or "\\".
When you are editing conditional formatting on a field in a crosstab, Server displays the Toggle to Formula button  . Select the button, and you can then choose a formula from the value list to use its value in the condition.
Logic
Select a logic operator.
- AND
Select to connect this line with the next line using the AND logic. - OR
Select to connect this line with the next line using the OR logic. - END
Select to end the whole condition expression.
 Back to top
Advanced Mode
You can build more complex filter conditions by grouping conditions.
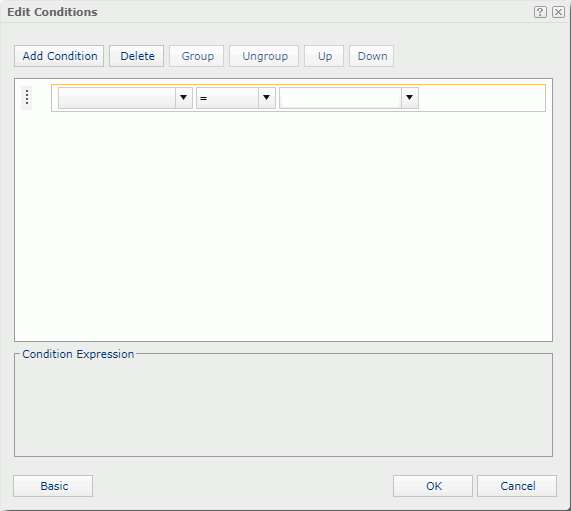
Add Condition
Select to add a new condition line. Each condition line contains an expression which is composed of a field, an operator, and a value.
Delete
Select to delete the selected condition lines or groups.
Group
Select to make the selected condition lines become a group. A group can only have one logic operator to connect all its condition lines. For example, a group contains three conditions lines, which are expression A, B, and C, and the group's logic operator is OR, then the group's expression is: A OR B OR C.
You can also add condition lines to an existing group. Select the condition lines and the group while selecting Ctrl, and then select Group.
Ungroup
Select to move the selected condition lines and groups out of a group or disband a group.
Up
Select to move the selected condition line or group higher.
Down
Select to move the selected condition line or group lower.
Logic
Specify the logic operator of a condition group. Each time you select the logic button, Server displays the next item following the order below.
- AND
Connect all the condition lines and groups in the group using the AND logic. - OR
Connect all the condition lines and groups in the group using the OR logic. - AND NOT
Connect all the condition lines and groups in the group using the AND NOT logic. - OR NOT
Connect all the condition lines and groups in the group using the OR NOT logic.
Field
Select the field you want to filter.
Operator
Select the operator to compose the filter expression.
Value
Specify the value of the field.
Condition Expression
Server displays the SQL statement of the filter condition.