 Previous Topic
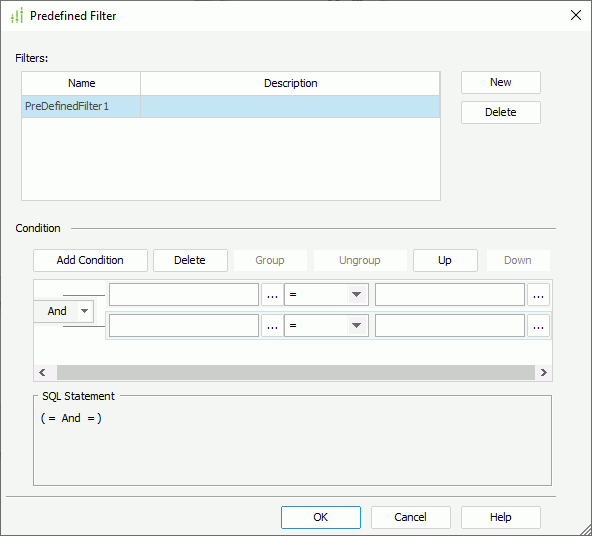
Predefined Filter Dialog Box
You can use the Predefined Filter dialog box to add predefined filters to a business view, which you can apply to filter the business view while creating and modifying reports based on the business view at both the design time and runtime. This topic describes the options in the dialog box.
Designer displays the Predefined Filter dialog box when you select Menu > Tools > Predefined Filter, or Predefined Filter on the toolbar in the Business View Editor dialog box.
You see the following options in the dialog box:
Filters
This box lists the predefined filters that you add for the business view. You can modify a filter's name and description in the box.
- New
Select to create a predefined filter for the business view. - Delete
Select to remove the specified filter from the business view.
You can specify the conditions of the specified filter in the panel.
- Add Condition
Select to add a new condition line. - Delete
Select to delete the specified condition line. - Group
Select to add the specified conditions in a group. You can also add conditions to an existing group by selecting the conditions and the group while holding Ctrl on the keyboard and then selecting the Group button. - Ungroup
Select to ungroup the specified conditions. - Up
Select to move the specified condition or group up to a higher level. - Down
Select to move the specified condition or group down to a lower level. - Logical operator drop-down menu
Specify the logical operator to apply for the specified condition lines. It can be "And" or "Or". - Field text box
Specify the field on which to set the filter condition. You can either type the field name in the text box or select the ellipsis to specify the field using the View Element Resources dialog box.
 - Operator drop-down list
Specify the operator to compose the filter condition. - =
Equal to - >=
Greater than or equal to - >
Greater than - <
Less than - <=
Less than or equal to - !=/<>
Not equal to - [not] in
The operator causes an enumerated list of values to appear in the WHERE clause predicate, and is used for evaluating for a true condition. For the operator "in" or "not in", you can use multiple values separated by comma (,). - [not] like
The like string pattern matching operator is used to compare the first expression string value to the pattern string (the second expression). If you want to use wildcard character in the pattern string, you can only use "_" and "%". - [not] between
The operator allows the system to evaluate whether data values are located between a range of values indicated in the predicate. For the operator "between" or "not between", Designer displays two value text boxes for inputting the same type of values. - is [not] null
The operator is used in the WHERE clause predicates to match null values occurring in a specified data field. For the operator "is null" or "is not null", Designer does not display the value text box. - Value text box
Specify the value of how to filter the field. You can either type the value in the text box or select the ellipsis to specify the value using the Values dialog box. - SQL Statement
This box displays the SQL statement of the filter conditions.
OK
Select to apply your settings and close the dialog box.
Cancel
Select to close the dialog box without saving any changes.
Help
Select to view information about the dialog box.
 Back to top